# hello ${name}!
Next, let's pass a name in each HTTP request and return it in the workflow response. This example builds on the workflow we created in hello world! and will cover how to:
TIP
If you didn't complete the previous example, we recommend you start from the beginning of this guide. If you still want to start here, copy this workflow and then follow the instructions below. If you have any issues completing this example, you can view, copy and run a completed version.
# Pass data to an HTTP triggered workflow via query parameters
First, modify the endpoint URL you loaded in your browser to trigger your workflow and add ?name=foo to the end (e.g., https://ENDPOINT-ID.m.pipedream.net/?name=foo). Then load it to make another request to your workflow. You should still see hello world! returned as the response from your workflow.

# Inspect the query data sent to the workflow
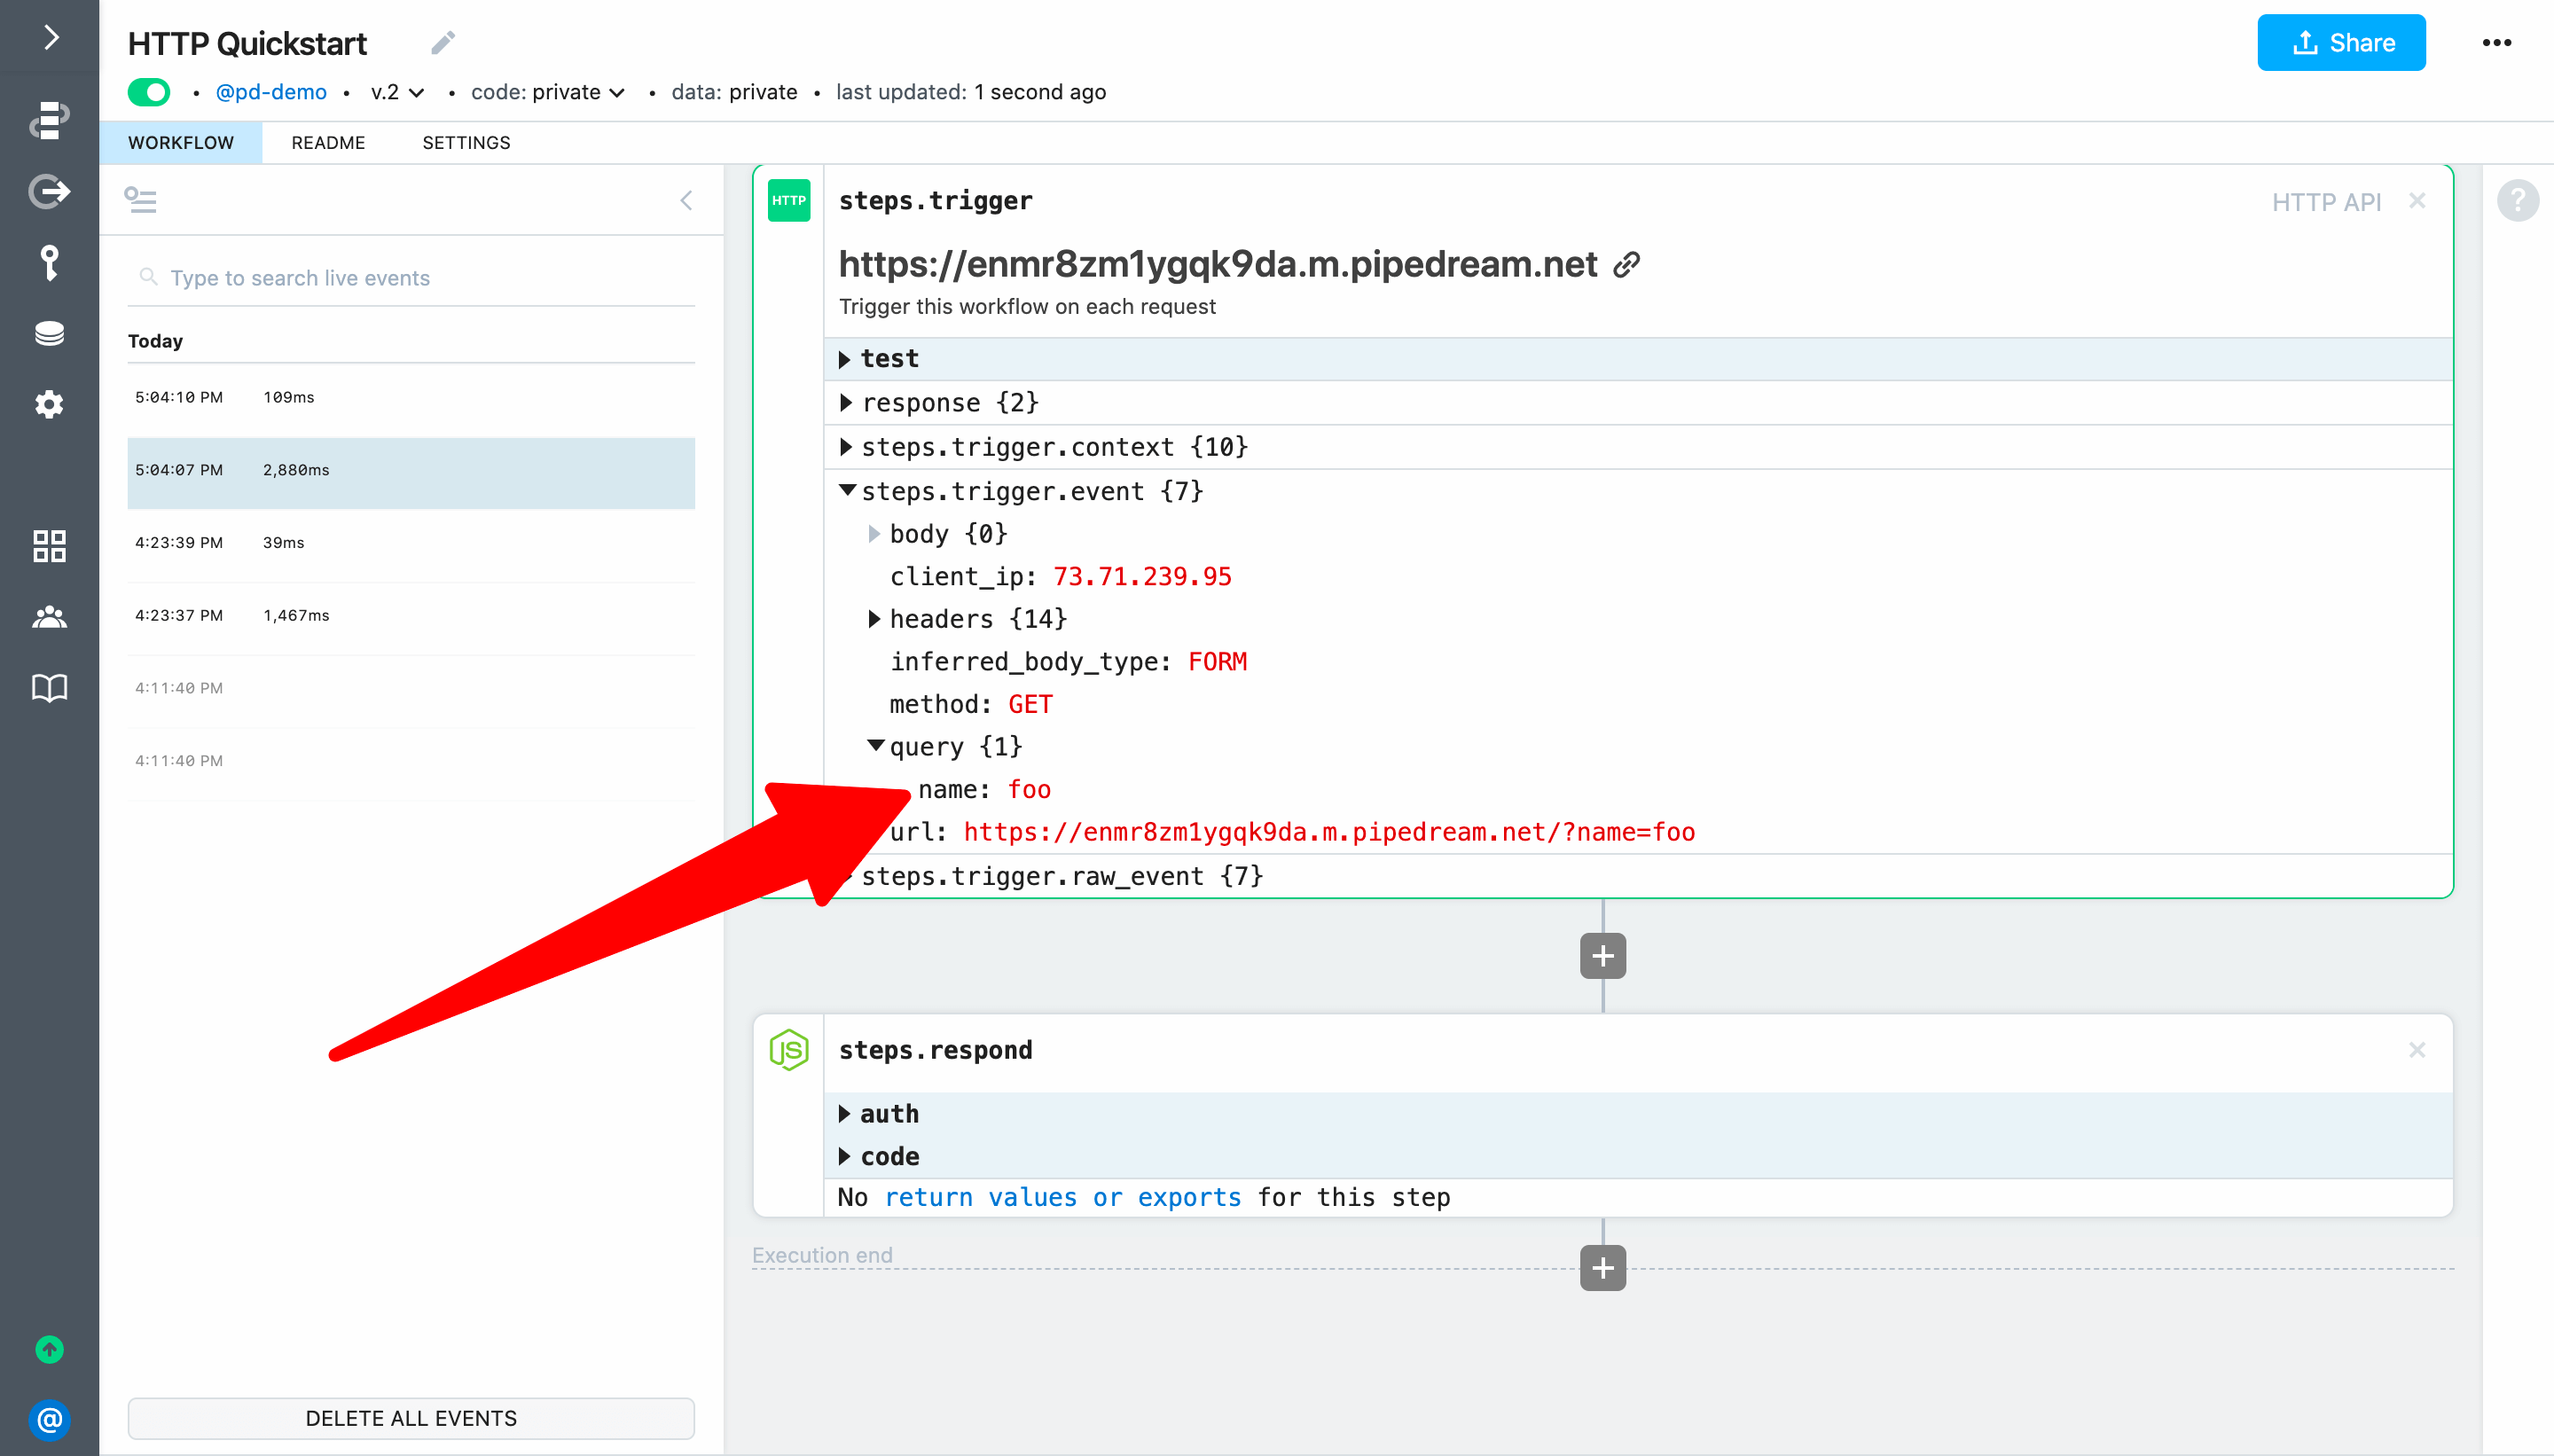
Return to Pipedream and select the event you just generated from the event list. You should now see {1} next to the query field indicating it has nested values. Expand it to inspect the query parameter and value for the request.

TIP
If you don't see any query data, check the url parameter in the steps.trigger.event observation to make sure you didn't select the event associated with the browser's favicon.ico request.
# Customize the HTTP response using data sent to the workflow
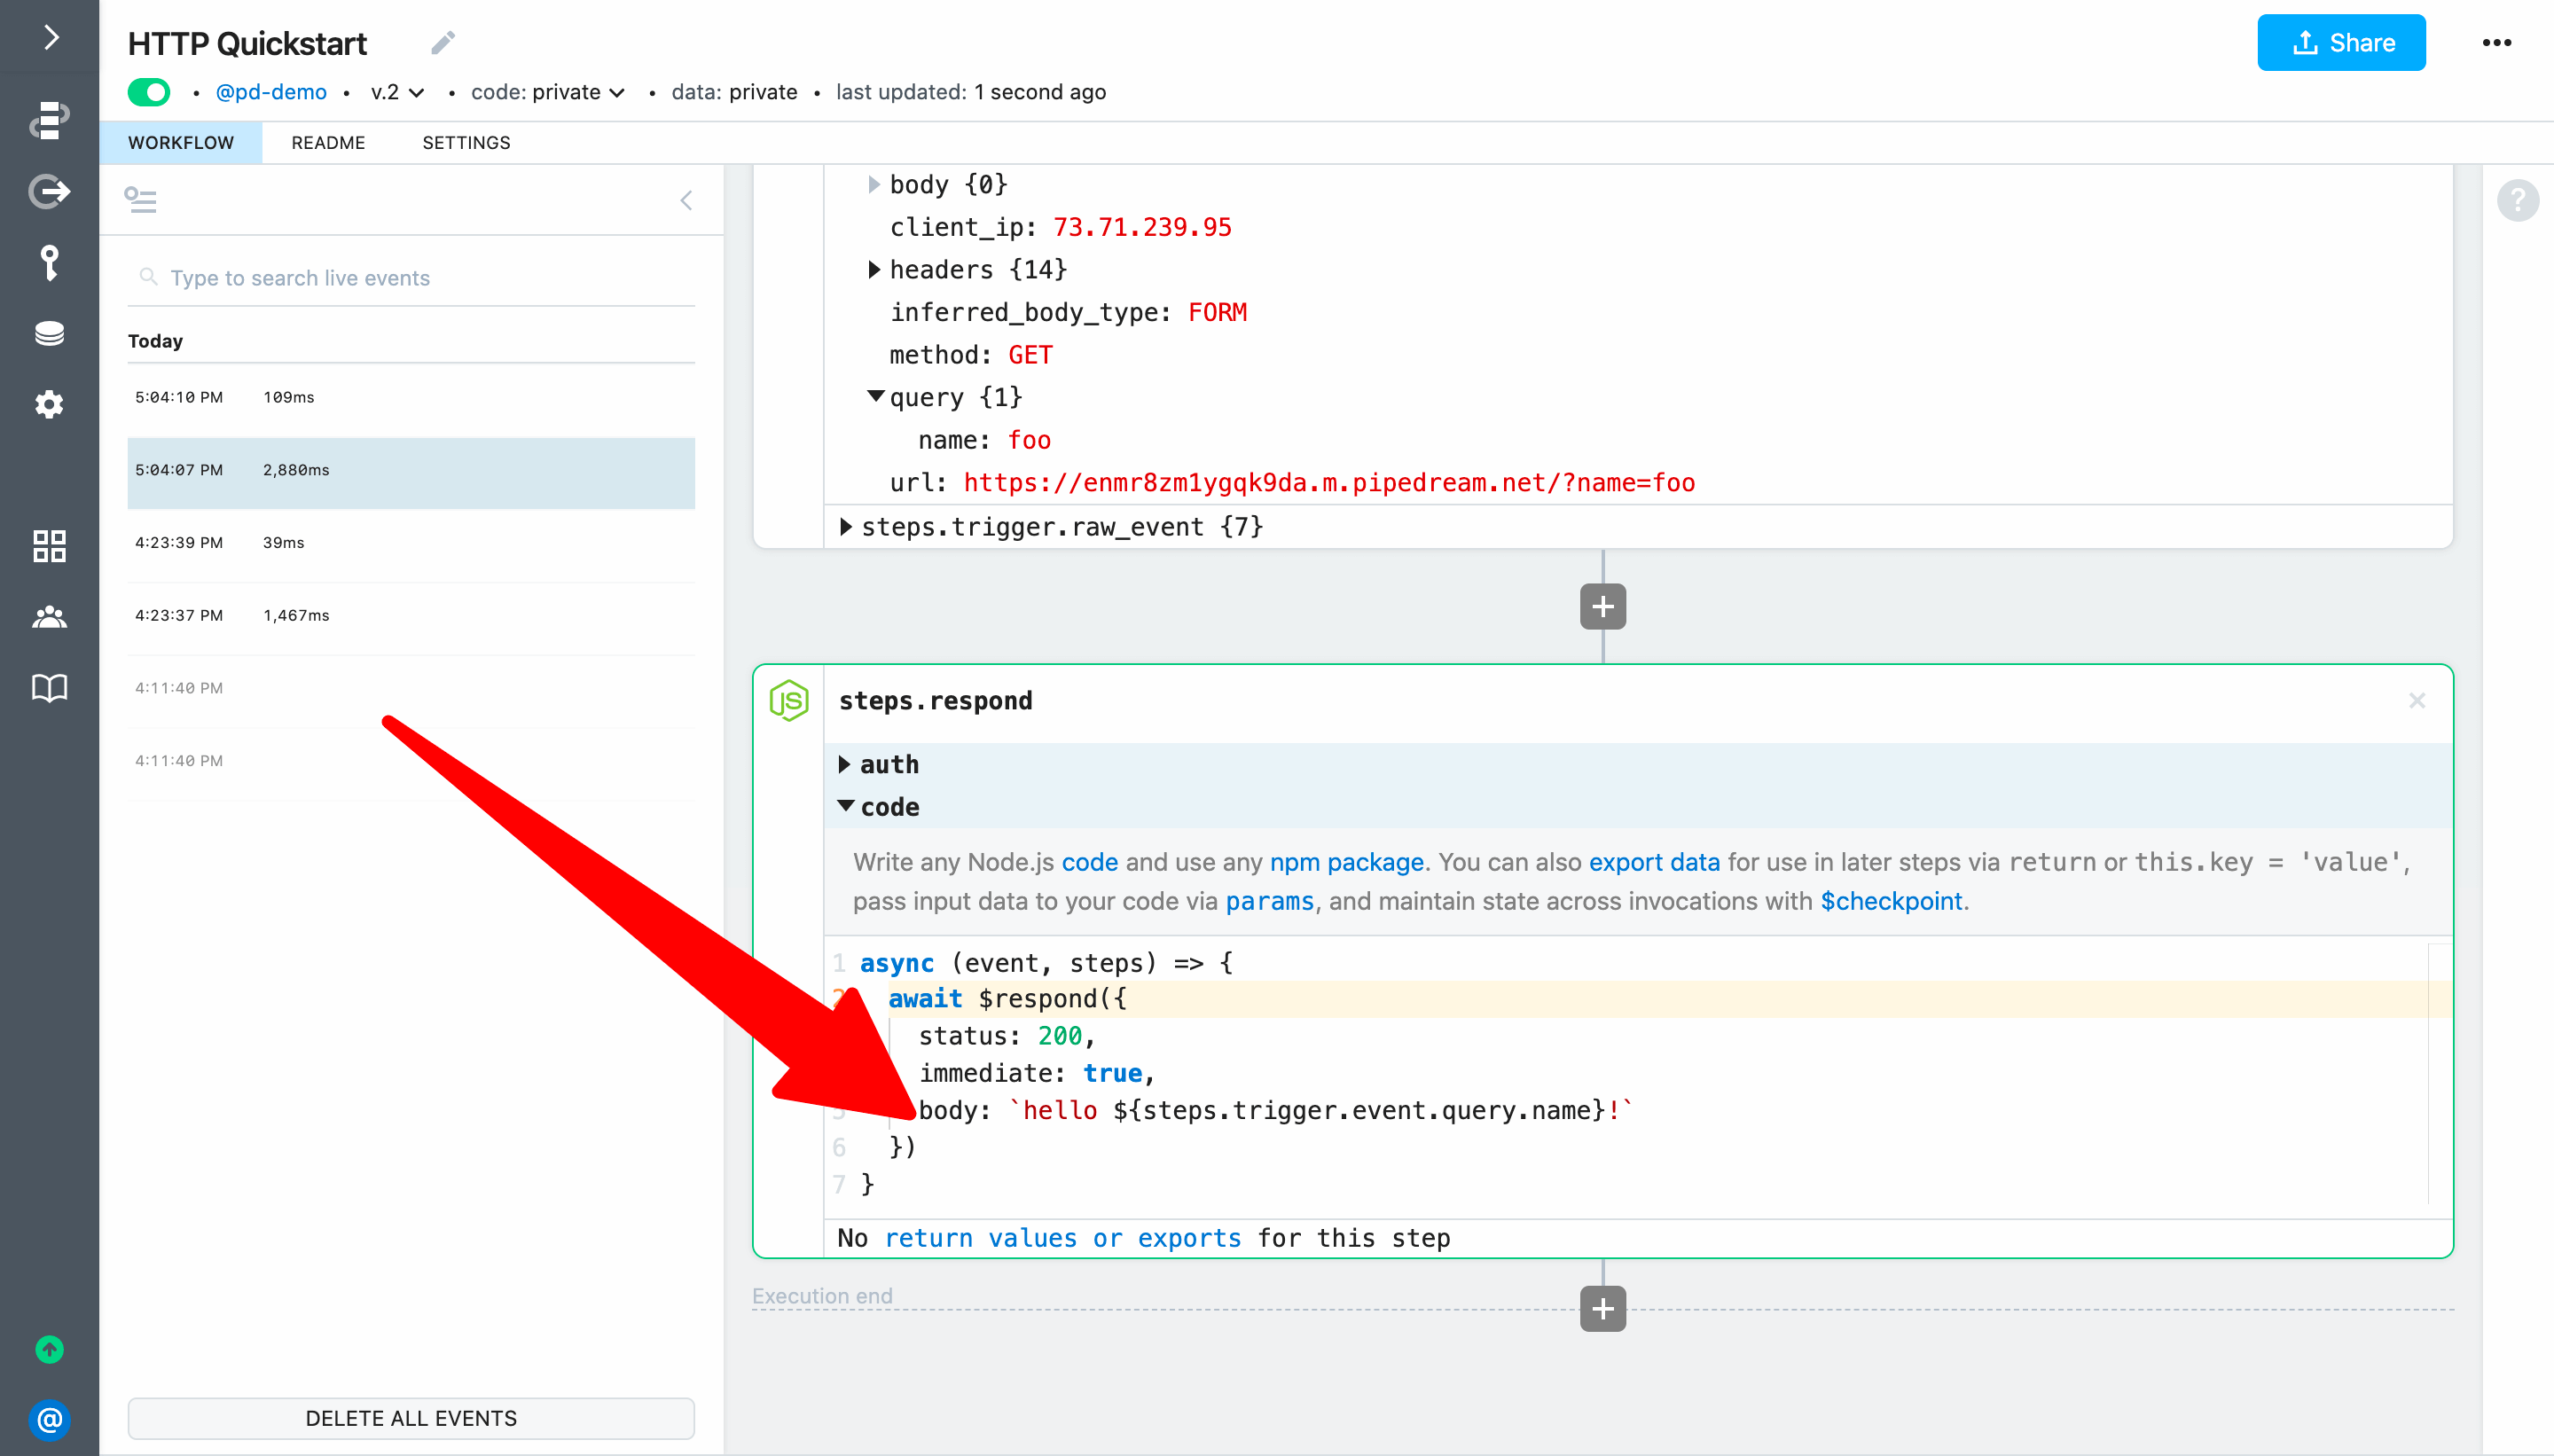
Next, let's incorporate this data into the workflow response. Expand the code section of steps.respond if it's collapsed. Then modify the value for the body parameter of the $respond() function and replace world with ${steps.trigger.event.query.name} to reference the name we're passing to the trigger:
await $respond({
  status: 200,
  immediate: true,
  body: `hello ${steps.trigger.event.query.name}!`
})

Finally, Deploy and reload the URL in your browser:

Your workflow will now return hello foo! (or whatever value you pass to name) instead of hello world!.
Next, let's add an action to make an HTTP request from this workflow.